Use this simple hack to create an index for your published book — using nothing Microsoft Word
Indexes are still essential for nonfiction books, especially those with content that readers want to reference over and over again. People still read more in print than in ebooks or audio.
As an author, you may not realize that you can make an excellent index yourself, especially if your book is well organized. And you can use a tool you probably already use, Microsoft Word, which has very good indexing features.
The main problem with Word as an indexing tool is that your book’s final page layout and pagination — the arrangement of content into pages — will differ completely from your Microsoft Word manuscript. The page numbers won’t line up. But there’s a clever way to fix this, which I’ll describe in this post.
Should you index your own book?
Typically, if you have an index at all, a professional indexer will create it. That costs around $1500 for a typical book. And you’ll likely pay out of pocket for that — often, publishers will deduct it from your advance.
But if somebody else does your index, they won’t know your content the way you do. And those indexers work in a great hurry, since they can’t start work until the page layout of your book is totally nailed down.
If you’re a disciplined thinker, you could do it yourself — and use the hack I describe here. Not only will you save money, you’ll create an index that matches your own ideas about what’s in the book. And you won’t have to do it in a rush, either.
Preparing to make index entries in Microsoft Word
If you’ve written your manuscript in Microsoft Word and handed it over as a Word file, you’re ready to create index entries.
There’s no point in starting the indexing process before the order and content of the text is settled. That means the ideal time to start is after the copyedits are complete.
Save a copy of your Microsoft Word manuscript file. Change the formatting in that copy so that it is single spaced, with no extra space after paragraphs. It will look crowded, but don’t worry about that — the point of this file isn’t readability.
Make sure you have tapped the “Show/Hide ¶” button so you can see all the hidden text in your file — including the index entries you are about to create.

The two kinds of index entries
Some index entries are very localized — for example, a single mention of a name, a place, or a simple concept. To create an entry for an instance like this, position the insertion point at the point you’re referencing and type Ctrl-Option-Shift-X (Cmd-Option-Shift-X on a Macintosh). You’ll see a pop-up that looks like this:
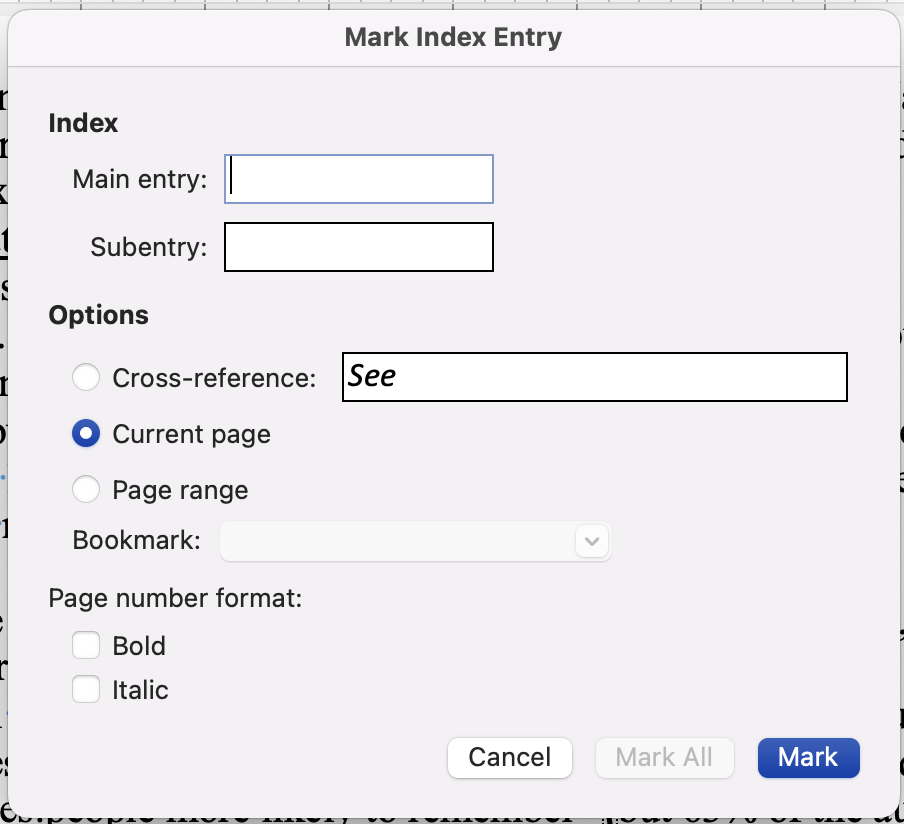
Now type the text for the entry you want to appear in the index into the field labelled “Main Entry,” (for example, “Heath, Chip”) and click on the Mark button. The pop-up remains up for convenience so you can make multiple entries, but the button labelled “Cancel” changes to “Close.” When you’re done making entries, click on “Close” to see the resulting index marker inserted your text. Provided that you’ve properly tapped the “Show/Hide ¶” button to view invisible characters, you’ll see an index marker within curly braces at the spot in the text that you marked, like this:

Later, when you make the index, whatever you entered (in this case, “Heath, Chip”) will appear alphabetized along with the other entries, followed by whatever page number the marker appears on.
As a shortcut, if you select a short piece of text before pressing Ctrl-Option-Shift-X, the pop-up will appear with the selected text already typed in the box.
To mark a subentry that will appear indented below a main entry, type the main entry text in the first box, and the subentry in the second box. For example, if you wanted Chip Heath to end up in a subentry under a main entry for “authors,” you would put “authors” in the “Main Entry” field and “Heath, Chip” in the subentry field. The resulting marker looks like this in the text:

To make an index entry that references a range of pages, you’ll need to make a bookmark. Select the multi-page block of text you’ll be referencing and then choose “Insert/Bookmark” from the menu. You’ll see a pop-up like this:
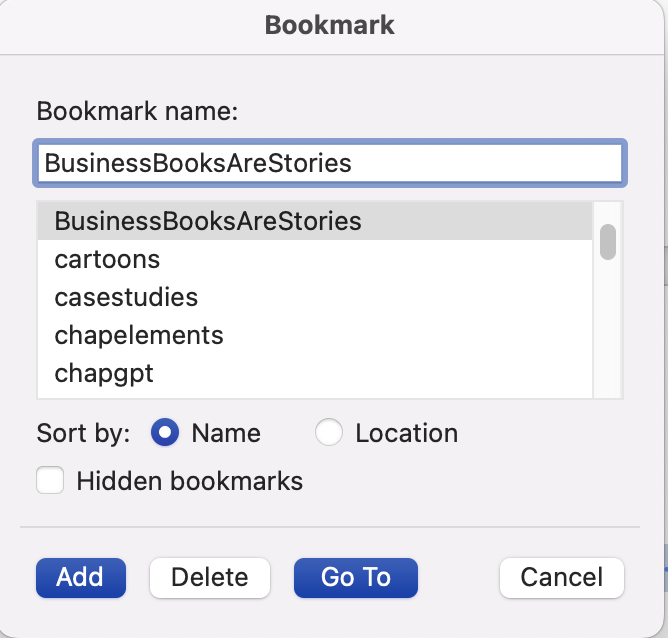
Now create a memorable name for the block of text with letters and numbers only and no spaces, for example, BusinessBooksAreStories. Click “Add” to create the bookmark for the selected block of text.
Then use Ctrl-Option-Shift-X to pop up the index entry box again, type the entry you want to appear, and use the Page Range part of the box to select the bookmark name you created. Once it’s selected, click “Mark.”
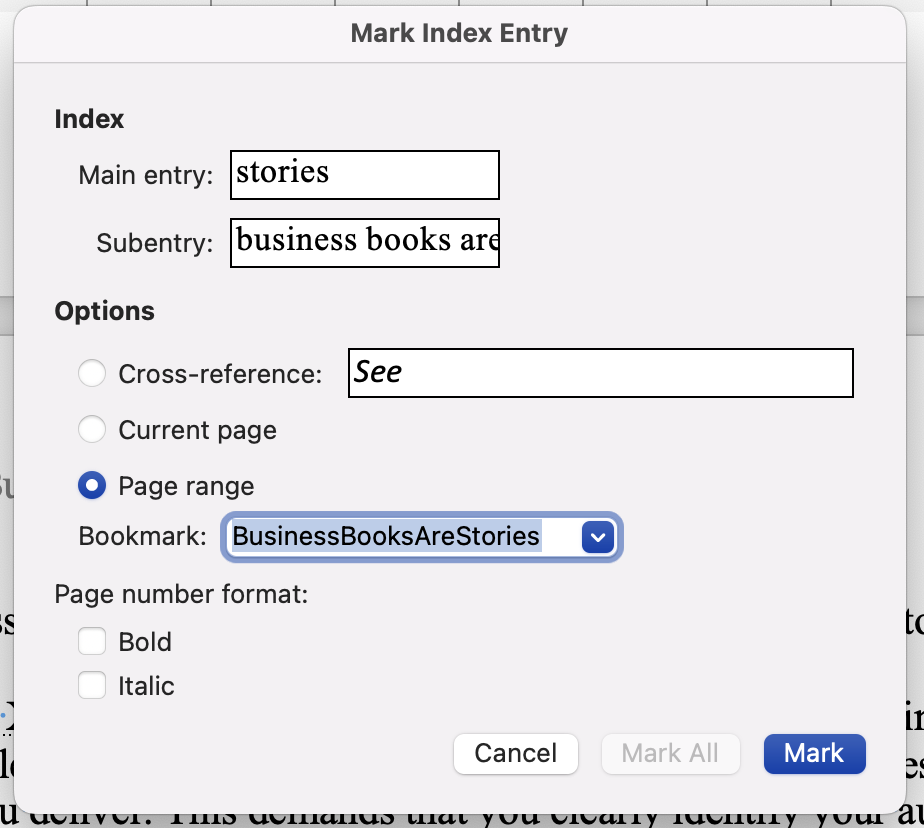
The resulting index marker looks like this:

When you create the index, this entry will appear with a range of numbers indicating the pages that the bookmark covers, for example, “15-20.”
The only safe way to enter these markers is with the pop-up box. Don’t try to type or edit them yourself, it won’t work — and it’s easy to mess up the markers you already created. If you make a mistake, position the insertion point just after the curly brace at the end of the marker and press backspace twice to highlight and then delete the marker. Then enter it again correctly.
When creating entries, keep the final index in mind
The mindset of an author-indexer viewing a piece of text in their book is this: “If a reader were looking for this information, what would they look it up under?” Then create index entries to allow people looking up that topic to find the content you’ve marked.
Don’t forget that readers may not be thinking of the same words you are. For example, if people are going to look up content under “book promotion” but might also think to look it up “author platform,” you might choose to include both in the index. You could create a cross-reference, like See (meaning, find the page numbers under the other entry) or See also (meaning, there is information here, but also under another entry).
To review how the index is coming together while you’re working on it, insert a working index at the end of your copy of the manuscript. Go to the end of your file and then choose “Insert/Index & Tables/Index.” This allows you see problems, such as entries that didn’t combine properly because you spelled a word differently, or entries with no page reference and a single subentry, which are better indexed as one simple main entry. (For example, if there’s no main entry page number and only one subentry under “stories,” namely “business books are,” then you may just want to put “stories, business books are” as a main entry).
Here’s a sample of part of an index showing how individual entries, page ranges, and subentries come together.
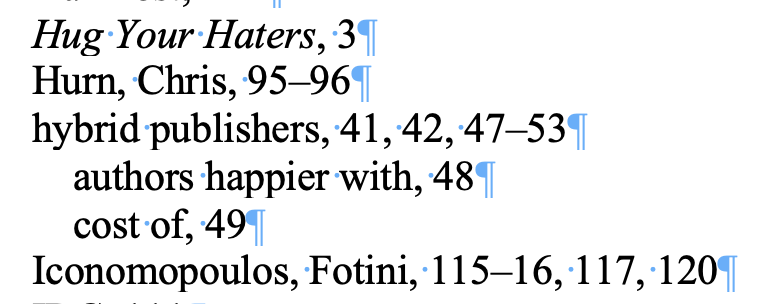
It pays to review the partially compiled index from time to time as you’re creating it, to manage it as a whole and deal with cross-reference issues. You can always refresh it by right-clicking and choosing “Update field.”
Here’s a tip: keep two windows open on the same Word file, one for where you’re creating the index entries, and another on the final index at the end of the file. Then you can regularly check how the entries you’re creating are aggregating together in the index.
A hack to address the book’s final pagination
I suggested making this index just after the copy edit stage. Within weeks (or if your publisher is slow, months), you’ll get to see a PDF with actual book pages in it. After a round or two of edits, the pagination of that content will be fixed. But of course, it won’t match your Word file, which uses a completely different set of fonts and formats.
The next step is to force your Word file with the index entries to have the same pagination as the laid out pages in the PDF. You can do this by inserting page breaks into your Word file at the same places as the page boundaries in the PDF. You may also need to move figures around to match their placement in the final page layout.
You can insert those page breaks with Ctrl-Enter (or Cmd-Enter on a Mac). Check carefully to make sure that the page numbers are the same in both the PDF and the modified Word file.
Now you will have a very ugly copy of the manuscript file. But it will match the pagination of the book. The point is not to print it out. The point is to use it make an index. And since its pagination now matches the fully laid out book pages, the index will match as well.
You may need to clean up a few things. For example, there may be a topic that you assumed would be covered in one page, but ends up spread across two pages in the final page layout. You’ll have to add a bookmark for it and replace the index entry to reference that bookmark.
But once you’ve done that cleanup, you can generate a full index for your book. And once you’ve created that index, select and copy the text for the index and paste it into a new Word file. Send that Word file to your publisher to use as your index.
Pros and cons of this approach
Should you make your own index this way?
Here are some reasons you shouldn’t:
- You find reviewing and referencing your own content tedious.
- You’re not an organized thinker.
- You don’t have time. Making the index for a typical book takes about 20 hours. Fixing the pagination using my hack takes an hour or two.
But here are some reasons you should:
- Your publisher won’t do an index for you.
- Your publisher will do an index, but will charge you, and you don’t want to pay.
- You feel you know your content better than any indexer will.
- You’d like to be able to turn in the index within a day or two of receiving the final paginated PDF, rather than waiting for an indexer to do their work hurriedly in a week.
Interested? Let me know if this works for you.
Manually breaking the pages in Word to replicate the publisher’s PDF is, indeed, a clever hack. Sometimes, the most practical solution combines automation and manual intervention.