Using Microsoft Word to prepare a book manuscript? Avoid these 14 mistakes.
You think you know how to use Microsoft Word to write? What you’re doing may be fine for creating a draft to print out, but confusing to the people doing the book page layout and design. If you’re preparing content to be laid out in pages, here are a dozen-plus simple mistakes you really ought to avoid.
A better way to think about what you’re writing
My experience has given me a unique perspective on this. I’ve written or cowritten six books and edited a dozen more, interfacing with traditional publishers, hybrid publishers, and self-publishing page layout and design professionals. I’ve also run the print production department at a publisher, so I know how things look from the other side.
Based on that experience, I want you to think differently about what you’re writing. You’re used to thinking of your writing software as a place to put words and massage them into a book-length piece of writing. But in addition to being able to print out that draft, you are communicating what you want to the people doing page layout and design with a tool like Adobe InDesign.
You need to deliver a structured manuscript, in which each formatting decision reflects the meaning of the different pieces, not just a big file designed to look decent when you print it out. This isn’t hard to do. You just need to avoid a few common mistakes that will confuse your publisher’s designers and make it easier for errors to creep into the final pages.
There’s one prerequisite for all these tips. Click on the “Show/Hide ¶” setting in the Home ribbon on word. It’s here:

You can also turn this on and and off with Ctrl-Shift-8.
With this setting on, you can see all the invisible formatting marks I’ll be talking about in the rest of this post. If you find them distracting when you’re writing, just click the ¶ again to toggle them back off. (In case you want to impress literary friends with your weird vocabulary, the ¶ symbol is called a “pilcrow.”)
1 Don’t use line breaks in the middle of paragraphs
Sometimes authors want to force lines to break at a specific point, so they either hit Return or Shift-Return in the middle of a paragraph. The result looks like this.

The blue arrow indicates that the writer hit Shift-Return, a line break. If you pressed Return, you’d see a paragraph mark.
Either way, that break is now part of the text. And when the text is reflowed into pages or in an ebook, you’ll see a break in the middle of that paragraph where you don’t want it.
2 Don’t use blank lines to separate paragraphs
If you’re writing in block paragraphs without indents, you need space between paragraphs. The easiest way to do this is to hit Return twice at the end of a paragraph. The result looks like this:
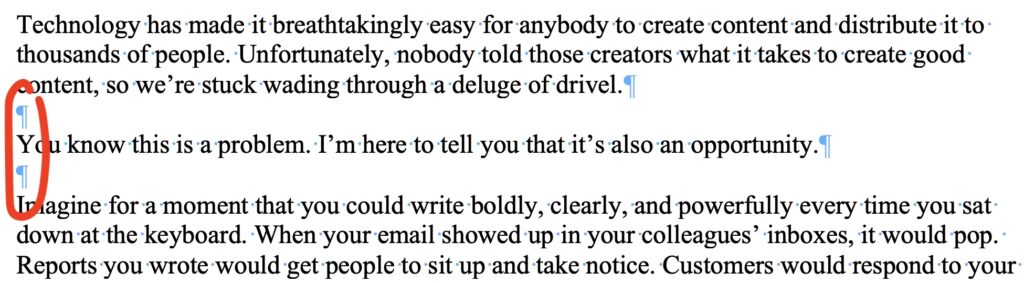
When that goes into page layout, you’ll have extra space after each paragraph. Yes, the designers can do a search-and-replace on two paragraph marks in a row — but chances are you haven’t done this consistently, so a they’ll miss a few.
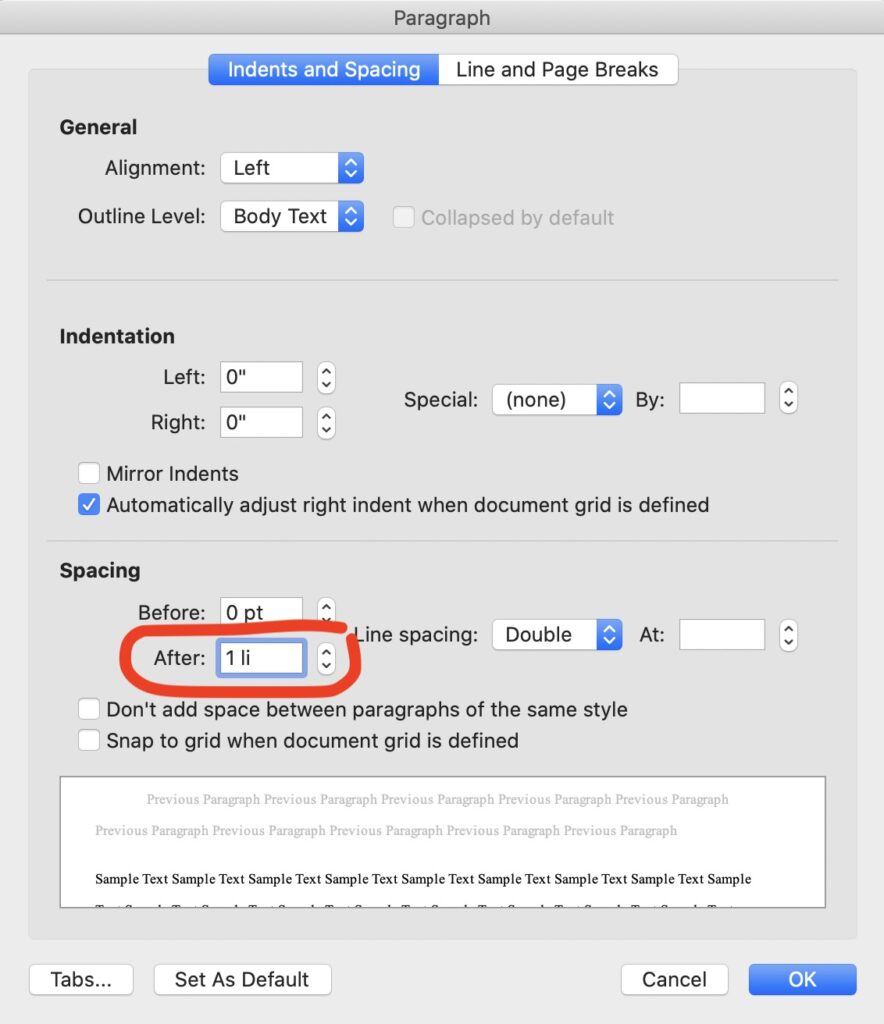
Instead, add space after the paragraph by formatting it (Format > Paragraph, then select Line and Page Breaks and add 1 line of space after a paragraph).
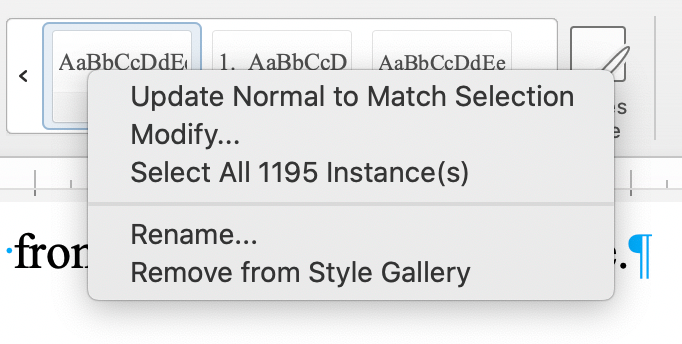
To change all the paragraphs in the document to have extra space, change one, select it, and then right-click on the Normal style and choose “Update Normal to Match Selection.”
And to undo most of the extra lines you added, search and replace “^p^p” with “^p” . (The search interprets “^p” to mean a paragraph break.)
3 Don’t indent paragraphs with tabs
Do you hit tab at the start of each paragraph? Stop doing that.
If you want indented paragraphs, change the Normal paragraph style to include an indent.
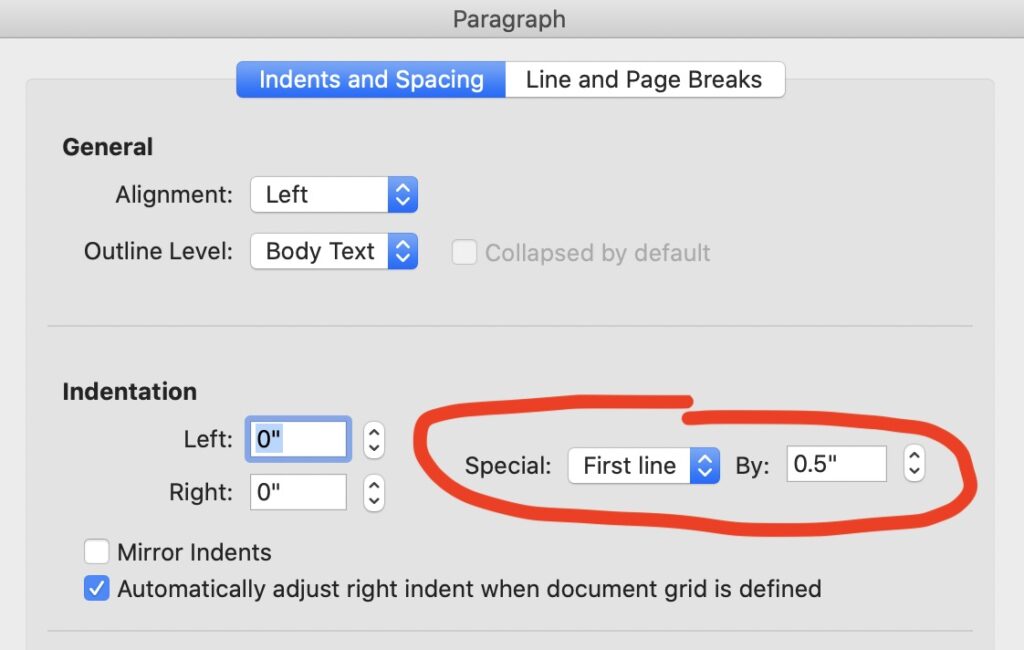
You can apply this to all paragraphs by changing the style to match, as I describe in the previous item.
4 Don’t use two spaces after a period
If you learned to type in the 60s or 70s on a typewriter, this is a habit you need to unlearn. In typeset text, two spaces is distracting, resulting in uneven-looking paragraphs. Your designers will need to remove them all, but if they miss a few, the result will be uneven spacing.
You’ll be able to see the two spaces as blue dots in the text, once the Show/Hide ¶ is on.
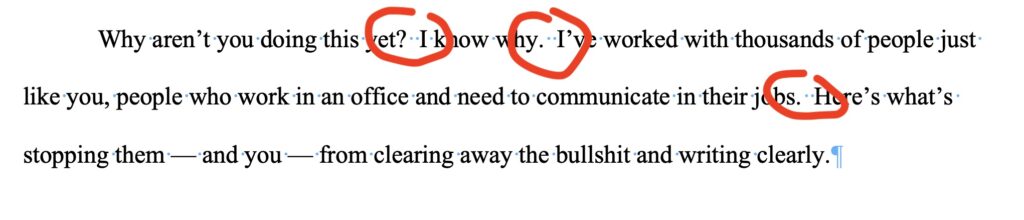
You can fix this by replacing two spaces with one in search-and-replace, or “. ” with “. ” But some sentences end with question marks, quotation marks, or, horrors, exclamation points. It’s better to learn the habit of not doing it in the first place.
5 Use real headings, not just bolded type
How do you mark a subheading in your text? It might look fine if you just made a line that stands alone in bold type.
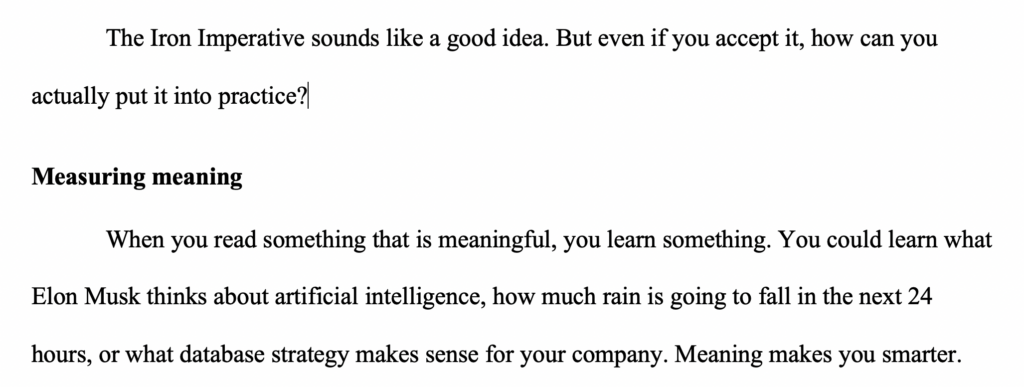
The problem is, the designer can’t easily spot this and designate it to be in whatever typographical style the design needs for a heading. They need to find and mark each one. And they might miss a few.
Instead, use the styles in Microsoft Word and designate it as a Heading 2 or Heading 3.
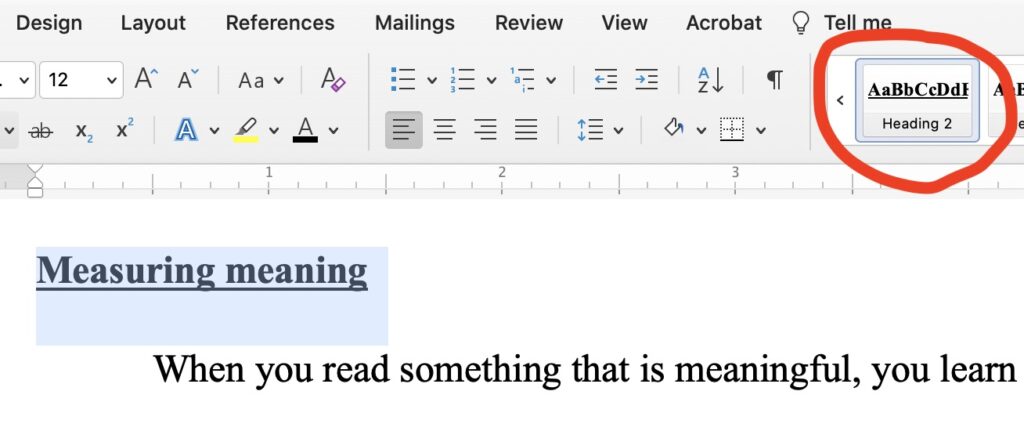
Now your designer will know not only that it is a heading, but what level of heading it is.
If you don’t like the way the heading looks, just change the style of that heading (type size, bold, underline, etc.) and change all the others to match, similarly to what I described for changing the Normal style. Don’t worry, the designers will ignore all those stylistic choices and use whatever fonts and styles apply to headings in your book design.
6 Don’t insert random page breaks
You can insert a page break at any point in your manuscript by typing Ctrl-Return, or using the Insert menu. But how will the designer interpret your page break?
If your problem is that headings are not staying with the text that follows, changing the heading style to include “Keep With Next” (it’s in paragraph formatting). You can also designate groups of text with “Keep Together.”
If you must include page breaks, just be aware that the designer will likely ignore them in the final layout.
7 Use italics in body text, not underlined or bolded text
Book interior designs generally use italics for emphasis. If you use bold, your writing will look amateurish. (Often bold is used for other purposes, such as headings or text that was shown on a computer screen.) And in professional writing, nobody uses underlines for emphasis.
And avoid words in all caps. That’s only appropriate for texting.
8 Add footnotes or endnotes for links
The easiest way to keep track of referenced material is to add links to your Microsoft Word text. Just highlight a word, press Ctrl-K to pop up a link, and paste in the URL.
Those links will be useful for including in the ebook.
However, they obviously won’t work in printed text. Before turning in the manuscript, you’ll need to add a footnote or endnote with the reference material. These days, most books use endnotes — they’re far easier to deal with in the layout process and don’t clutter up the text.
Microsoft Word’s footnote and endnote features work fine, you may as well use them.
9 Use a consistent typeface, size, and color throughout
Maybe you think it’s fun to put some words in red, use bigger type for others, and put some in a different typeface.
This won’t translate well into printed material. And your designers will either ignore the odd type or be puzzled about what to do with it.
Some specific text elements (such as captions, headings, epigraphs, and footnotes) belong in different styles of type. And some books use a different typeface for specific design elements such as sidebars or computer code. But unless you’ve discussed the reasons for these choices with your designers, your oddball type styles won’t translate well into the final pages.
10 Don’t use weird characters
Here are some characters that will puzzle your designers: emojis, symbols such as dingbats, and fractions. Who knows how they’ll appear when set into type in the font the designer has chosen?
Limit yourself to the normal character set (including accented letters, which are in every font). If you want to use a specific symbol such as an arrow, discuss it with your designers. If you fail to alert them, the symbol may just disappear in the laid out pages.
11 Mark bullets and numbered lists using the Word style choices
If you want a bulleted list, use a bullet style from Word, or just click on one of the list options in the toolbar.
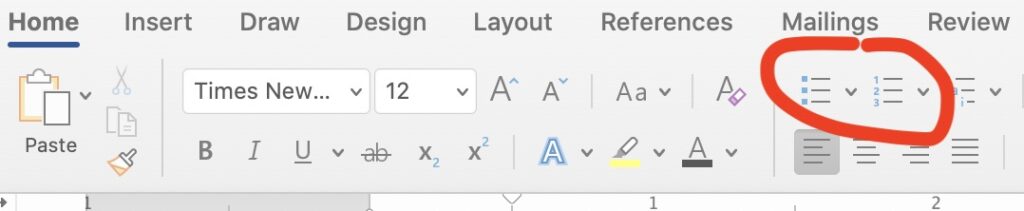
This tells your designer that yes, this paragraph is a bullet.
If you just start a paragraph with a hyphen or a number, it may not be clear if it’s supposed to be part of a list.
12 Use two hyphens for an em dash, and don’t worry about smart quotes
Word is pretty good about turning two hyphens into an em-dash and turning quotes and apostrophes into typeset-style quotes. And your designer’s software will generally handle those characters properly. Even so, be on the lookout for straight quotes and double-dashes in the laid out pages, in case some characters escaped detection and conversion.
13 Use caution with tables
The best way to include a table in a manuscript is to just build it in Microsoft Word.
But because the pages in the book are a different size from the pages in your manuscript file, you can’t assume the result will magically appear as a perfect-looking table.
Be prepared to speak with the designers about each table and how to lay it out in the finished pages.
14 Communicate separately about graphics
It’s pretty easy to put a graphic into Microsoft Word. But if you just send the publisher that file with the embedded graphic, you haven’t completed your job.
You’ll need to figure out how to get that graphic looking professional, with typefaces that match the rest of the text. See this for more detail.
Microsoft Word has features — but you must think about how the designer will interpret them
Microsoft Word lets you indent things, create indexes and tables of contents, draw boxes around text, use multiple columns, add page headers, embed graphics and wrap text around them, and add tables of references. And that’s not nearly a complete list.
But Microsoft designed those features to make output from Word look great. They don’t all translate into similar features in printed pages in a book.
For every feature you use in Word, you must ask yourself, how will the designer interpret this? It may be better not to use it — or to plan a discussion with the designer to ensure you’ve communicated what you’re looking for.
One final note. As you’ve seen from these tips, it pays to learn to use Microsoft’s styles to indicate things like chapter titles, headings, block quotes, graphics captions, and bullets. If your book has a unique text element, create a style for it. Then work with your designer to communicate what each style means. That’s the consistent way to make sure the pages in the book and ebook reflect your intent. And it works a lot better than using indents, fonts, and color in idiosyncratic ways that will leave the designer scratching their head and wondering what you had in mind.
Thinking of the manuscript in terms of structure and styles will also improve your own writing discipline. It’s a skill worth developing. And it will significantly reduce the amount of checking required in the page layout stages — and the chances of an error getting into print.
The best part of using headers is the Navigation Pane. Word lets you easily move throughout the document.
I showed an ex-colleague this feature and it blew his mind.
You mean headings, but yes.
Shoot, Josh, I needed this years ago! What a great Word tutorial. Thanks ANYWAY.
(At least I had figured out the pilcrow … although I didn’t know its name.)
Very good review! I have a novel in Word ready for edit and I’ll use your checklist to save everyone time. Thanks!
Josh These are great. I have a #15 for you: As you probably know, in the Review ribbon, it’s possible to have “Simple Markup” selected instead of “All Markup.”
It’s great for writing because you can clearly read what you’re editing, but the absence of editing marks in the text (ignoring the indicators at the left side) has caused many people not to remember to accept all tracked edits before they hand something in!
This is a great tip. Because unaccepted changes will confuse the heck out of the designers!
Excellent checklist Josh. I know every one of those points (though not all your shortcuts) and would likely forget a quarter of them, especially while working in Word; ubiquitous as it is, it’s not my favorite program. Thank you.
Irrelevantly, I hope you will at some point publish together your Rationalist papers from the fall of 2020. They were the highlight of my morning in those confounding days.
I appreciate the sentiment.
The election result was all the thanks I needed, as it turned out.
I have a regular client who’s a lawyer, and am repeatedly telling her not to use underlining for headings or other emphasis, because in today’s world, people expect a link when they see underlining. Lawyers also fulky justify text a lot, which leads to strange spacing within a block of copy.